Trampoline installation by yourself is always recommended as this allows you to do it in need of essence. But as a beginner, you may face some trampoline installation issues, right?
What are the common trampoline assembly problems and errors? Some of them are not following the manual, not considering backyard space, wrong spring placement, faulty net assembly, so on. These unwanted mistakes could end up your trampoline fun and could be safety hazards. So, you should know the right ways to avoid these setup errors
You can make trampoline installation mistake-proof by learning the right trampoline assembly instructions. This article will cover trampoline assembly troubleshooting, so you can avoid mistakes.
Trampoline Installation Problems and Mistakes You Should Avoid

1. Not Following the Directions
After opening the trampoline box, you may feel it is a big puzzle that you want to solve right now with your own wisdom. But that’s not a good idea firsthand.
This is a trampoline, not a puzzle game that you can play as you wish. But if you still have the determination to do it on your own you will never reach the perfect set you want.
So, the only and foremost rule to solve this trampoline error is to follow the manual. Each and every trampoline has its own assembling direction. So never forget to read the manual and follow the steps.
See Also: Trmpoline assembly and disassembly tools
2. Not Laying Everything Out Before You Begin
Reading manuals is not enough! You have to identify all the parts inside the box to properly put together the trampoline.
For that, the first thing you have to do is lay out all the trampoline parts from the box and identify which is what. Lay all the parts on the ground like puzzle pieces and then join them accordingly.
3. Backyard Space Issues
You might have the dream of having the bigger one. But it won’t always justify the space you have in your backyard.
This is a common mistake done by almost everyone where people actually don’t take a proper look into their yard space and buy big trampolines that end up not fitting their space. So, first, measure your space and then buy the trampoline accordingly.
4. Not Leveling the Ground Properly
If your backyard isn’t leveled well, it’s important to do some ground works to make it leveled before you install the trampoline. Otherwise, this will damage the trampoline as well as you won’t get the proper bounce from there.
It’s also important to put the right things under the trampoline to ensure an ideal trampoline base and jump bed for a lovely bounce.
5. No Advance Planning of Installation Time and Place
This might not be a big issue, but you should keep this one in mind too. Always plan ahead the time and place before starting trampoline assembly. It is quite obvious that you are going to take at least two to four hours to complete the whole work.
But if you make a rush in this whole process, you will miss minor, but important parts and instructions of trampoline assembly.
Also, as it is a big piece of toy, you need to assemble it on the spot, right where you want to keep it. It will be much more convenient to shift the small parts or unopened boxes than to shift the full assembled trampoline.
6. Not Having a Proper Work Area

It’s a common and important thing you should keep in mind before starting any kind of work. You should have a properly clean work area with all the necessary tools you may need to assemble the trampoline.
If you miss any tools to have by your side, it may break your concentration to work as you have to go for bringing the tools. Also, if the area is not clean you may get hurt or have an unwanted accident in between work.
Read Also: Can you install a trampoline on concrete?
7. Doing It Right Side is not Always Right
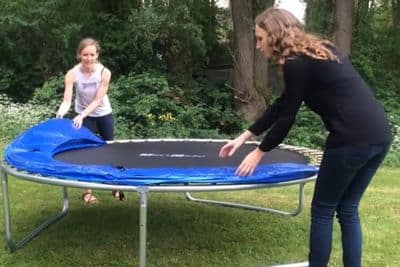
Always assemble the frame upside-down. It may sound awkward to you at first, but you are going to thank me later. The simple reason for this upside-down assembly is when you put up the trampoline in the right direction the holes stay down digging into the soil.
And if you have some greeny fresh grasses coming out of the lawn, then they are going to ruin as well. Another good reason is, assembling upside down allows you to join the legs easily.
Otherwise, you will have to hold the frame up and then put the legs in the frame. So, assembling upside down is going to help save your time and energy both.
And also, it will be very easy for you to just turn the frame after completing the assembly and enjoy trampolining.
Read Also: Fix bend trampoline frame
8. Assembling the Main Frame First
This is another common mistake made by many people in home trampoline assembly. Maybe you’re doing this to complete one section first, but that is going to be a little difficult as attaching the legs will become tough for you.
Plus, imagine the weight you have to take while turning over the trampoline. Hurting back, right? Rather take a section of the top rail, attach the leg and turn it over. Then assemble all the sections together and voila, your trampoline has made another step of completion.
See Also: Trampoline frame ring stuck together Fixed
9. Confusing the Legs and Tubes
It is pretty common when two things look so similar, you are going to confuse them. The same happens in the case of leg braces and curved tubes. Many people use curved tubes in the space of legs, which makes the trampoline look funny.
But still, there is a way to come over. Just look at the size and you will find your way. The middle legs are shorter than the curved tubes, so you can easily identify them.
10. Not Paying Close Attention to the Parts
Another common confusion occurs in identifying the Key-1 and Key-2 parts of the top rail of an oval trampoline. Unless you have successfully avoided the first mistake, you probably do not know what these things actually are.
Well, these are two parts of each section’s top rail, which obviously look the same. So, the only way to identify them is to follow the trampoline assembly instructions manual. There you will find a detailed description of what Key-1 and Key-2 are.
Read Also: Why is my trampoline so squeaky?
11. Wrong Spring Placement
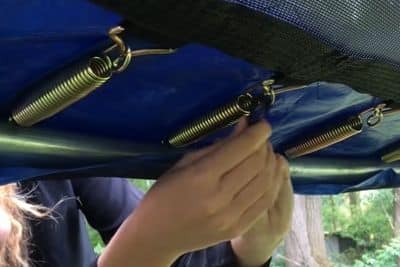
Each brand of the trampoline has its own way of spring placement. But thinking themselves wiser than the manufacturer, many people had made the mistake of assembling the springs their own way. Which definitely creates a big blunder!
The placing of the wrong springs creates an uneven stretch in each spring. This might also loose the mat. Also, it doesn’t allow the mat to take all the pressure on the center.
And even don’t create the proper bounce you want. So here the best way is to follow the specific guideline given in your trampoline manual. Though it will be crucial to follow all steps, you have to do it to prevent future chaos.
Take proper time to ensure that each V-ring and frame hole is properly aligned as the manual requires. But if you fail to fill all the V-rings or a frame hole, then the springs will end up slanted.
See Also: Problems of Springfree trampolines
12. Putting All Springs Together

Another mistake, done with the springs, is putting them in line together. When you assemble the mat by putting all the springs one by one, it creates an unwanted stretch when you reach the opposite.
You literally have to go for a war with the mat to fit in at the other end, and the possibilities are you will be left empty-handed. So, the best way is to put spring on every 10th position first, then go for the middle ones.
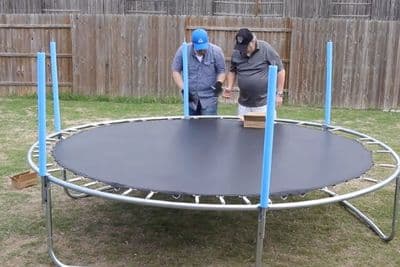
13. Enclosure Pole Assembly Problems
When setting up the trampoline poles, the wrong lining up of holes in the enclosure pole tubes might be a potential error. The curve tubes you may see in most trampoline models have two holes on their different ends.
If those end holes don’t stay on top while assembling, you won’t be able to screw it up properly. So do it the right way.
See Also: How to repair poles of the trampoline?
14. Faulty Net Assembly
As most of us assemble the round trampoline, safety nets will always be a part of it. But most of us make mistakes in this part too. And which definitely results in our safety.
To avoid this trampoline assembly error, I suggest taking a deep look at the t-joints and t-sockets where you actually place the nets.
If you position the doorway of the net aligned to the t-sockets it will crook the net a little bit. After all, a pole in the doorway looks funny to all. So, to avoid this embarrassment, you have to be sure the net doorway is aligned over the T-joint and not over the T-socket.
See Also: Trampoline inside net and outside net comparison
15. Pole Cap Assembly
This is a widely held trampoline setup problem that you got confused about. This happens mainly for the tiny pole caps. Due to their small size, they are quite difficult to recognize whether you are putting the right one or not.
If you have a close look at your pole caps you will see two sides, one with a hexagon hole and another with a regular hole.
When you turn your bolt into the hexagon side, the possibilities are you will break it. But if you do the vice-versa, meaning if you go for the regular side turn, you will easily fit the nut into the bolt. Easy-peasy, right?
16. Not Identifying Two Types of Steel
The entire round frames of trampolines generally have two types of steel instead of one. And one type of steel has to be connected with another type of steel in every pole end. So, keep a close eye on the fact and join the poles accordingly.
Read Also: Trampoline weight capacity explained
17. Not Double Checking Your Work

Now that you have finished the trampoline in a good-looking situation, it doesn’t mean you have done it perfectly. Obviously, go for a double-check before flaring the finish flag.
Make sure all the nuts and bolts are tightened properly. All the parts have fallen into place perfectly. And any spring is not coming out.
Only after being sure, these crucial parts are done properly on the trampoline, you can allow your kids to hop on it.
18. Don’t Believe in the Power of Tools
I know you have much strength to pull out all the things together, but it doesn’t mean you can do it empty-handed. Take the help of all necessary tools (like a spring puller), and have the toolbox by your side during the whole assembly process.
19. Not Anchoring Down the Trampoline
You may often forget to tie down the trampoline on the ground after the trampoline assembly. Anchoring down your trampoline is an important thing as you may not want your trampoline to blow away in emergency cases.
Also, while regular jumping, the not anchored trampoline can flip over for not being able to stay in place for regular movements. So here the only solution is to anchor it down with sturdy anchors for the sake of safety.
20. U-shaped Stakes Facing Outward
This is a small thing to mention but still, it is important. While assembling the trampoline keep the U-shaped stake points inward. Otherwise, it may hurt nearby playing kids.
21. Not Having Spare Parts Handy
It is an after-assembly tip, but you may find it helpful. It is pretty obvious that the trampoline you have made today is going to need a little bit of fixing every time. But finding those square parts is not going to be easy for you.
So, it is best to have some square parts of your bolts, nuts, and especially the springs near your hand. It will help you to make a quick fix at any time and you may prevent an upcoming occurrence during this unfixed time.
Read Also: Problems of in-ground trampoline
22. Not Fixing Holes Immediately
It is also a part of fixing, but you have to keep in mind holes in the net mean a gap in your kid’s safety. So, whenever you find a hole in the trampoline mat fix it immediately. Replace the faulty spring and net soon.
Final Suggestions
So, after reading this article, you know how many chances you have to make mistakes in the whole trampoline installation time. As you now know all the trampoline assembly problems so try to avoid them and follow the right trampoline assembly instructions.
The best way is always to follow the manufacturer trampoline assembly manual from start to end. Though it’s going to be a little tough, you have to do it for the sake of better trampolining in the future. And if you want to hire professionals, contact any renowned nearby trampoline assembly service.

Rebecca is a fitness nerd and mother. She was inspired to get into the world of trampolining and rebounding by her husband Robert, who is a well-respected trainer and expert in the field. Now she instructs children, mothers, and teens the basic trampolining and rebounding tricks.
Rebecca is also a passionate blogger, sharing her knowledge and experiences with others in the hope of encouraging them to give trampolining and rebounding a try.
